Night photography, a fascinating subset of the photography world, unveils the celestial beauty hidden in the darkness. By capturing unique perspectives under the night sky, it presents a rare visual treat, the essence of daytime snaps often lack. Beyond the traditional scope of photography, night shooting allows photographers to explore the extraordinary. Indeed, the art of night photography is about embracing the darkness and turning it into a canvas.
Therefore, let’s embark on an exciting journey to master the craft of photography when the sun goes down. Understanding the best tips for night photography is the key to creating stunning, mesmerizing photos that tell a story through their silent and profound language. Here, I’ll explain in detail “the best night photography tips”. Let’s dive in deep.
Table of Contents
A: Understanding Your Equipment
To unravel the magic of night photography, your equipment plays a pivotal role. Let’s start by unravelling the essential gear required. Firstly, the camera remains at the heart of this creative endeavour. While all DSLRs or mirrorless cameras will work, models with high ISO capabilities are ideal for night photography.
Next, let’s talk about lenses. Fast, wide-angle lenses are your best bet, as they allow more light to reach your camera sensor. Remember, an aperture of f/2.8 or wider typically works wonders for night shots.
Also, always appreciate the value of a sturdy tripod in your gear collection. Given the slower shutter speeds needed for night photography, a tripod ensures sharp, clear images by reducing camera shake.
In addition, using a remote shutter release contributes to increased stability by enabling you to capture images without physically interacting with the camera. Plus, a flashlight or headlamp can prove invaluable, providing the necessary illumination to set up your gear in the dark.
Now that we’ve covered the essential gear let’s dive into camera settings optimal for night photography. Firstly, shooting in manual mode provides maximum control over your images. It might require some practice, but the payoff is worth the effort.
When setting the ISO, aim for a balance. A higher ISO increases sensitivity to light but can introduce noise into your photos. Therefore, start with a lower setting and gradually increase as necessary.
Moving on to aperture, you’ll likely utilize a wide aperture to permit as much light as possible. An f/2.8, for instance, should do nicely. However, capturing stars and wanting them to appear as sharp points might require a smaller aperture.
Next, consider your shutter speed. Long exposures are a common strategy in night photography. They let you capture enough light, even in darker conditions. However, excessively long shutter speeds may cause star trails due to Earth’s rotation.
Lastly, you have a white balance. Auto white balance often does the trick, but experiment with different presets for more control. For example, the ‘Tungsten’ setting can reduce the yellow colour cast caused by artificial lights.
In summary, understanding your equipment is crucial in night photography. So gear up and tweak those settings – the night is waiting for your creativity to light it up!
B: Preparation Before a Night Shoot
Before embarking on a night photography adventure, thorough preparation is a must. For starters, researching your chosen location is a step you should always pay attention to. It helps to introduce yourself with the landscape, landmarks, and unique features that act as your focal points. Moreover, scouting during daylight hours can offer useful insights for composing shots once darkness falls.
Understanding the moon’s phases and local weather is also crucial. The brightness and position of the moon significantly impact the lighting conditions for your shoot. A new moon is ideal for astrophotography, while a full moon can illuminate landscapes beautifully. Similarly, knowing the weather forecast helps you anticipate and adapt to your conditions. For instance, clear skies are perfect for star trails, while cloudy conditions might serve up dramatic cityscapes.
Another critical aspect is checking for light pollution. Urban areas usually have high levels of artificial light, which can impact the visibility of celestial bodies. Plenty of online resources and apps can guide you to dark skies, ideal for your shoot.
Lastly, but most importantly, are safety considerations. Venturing out in the night presents its own set of challenges. First and foremost, always let someone know your plans and expected return time. Secondly, it’s essential to pack the right equipment – think flashlights, extra batteries, warm clothing, and perhaps even a buddy to accompany you. You’ll also want to be conscious of any potential hazards in your location, from wildlife to rough terrain, and prepare accordingly.
C: Techniques for Night Photography
In the realm of night photography, mastering specific techniques can set your images apart. Among these, long-exposure photography stands out. It involves opening the shutter for an extended period, allowing you to capture more light and movement. The result? Stunning images with smooth water effects or light trails from passing vehicles are a few examples.
Then, we have light painting, an imaginative and fun technique. By waving a light source, such as a flashlight, during an open shutter, you can generate glowing designs and formations. The limit is truly your creativity here.
Next up are star trails. This technique utilizes the Earth’s rotation to create spectacular circular patterns in the sky. It involves super-long exposures or stacking multiple shorter exposures in post-processing. Either way, the ethereal effect remains the same.
For those fascinated by the celestial wonders, astrophotography offers a unique thrill. It involves capturing the night sky, complete with stars, galaxies, and celestial events. It’s here where understanding moon phases, avoiding light pollution, and utilizing long exposure techniques prove essential.
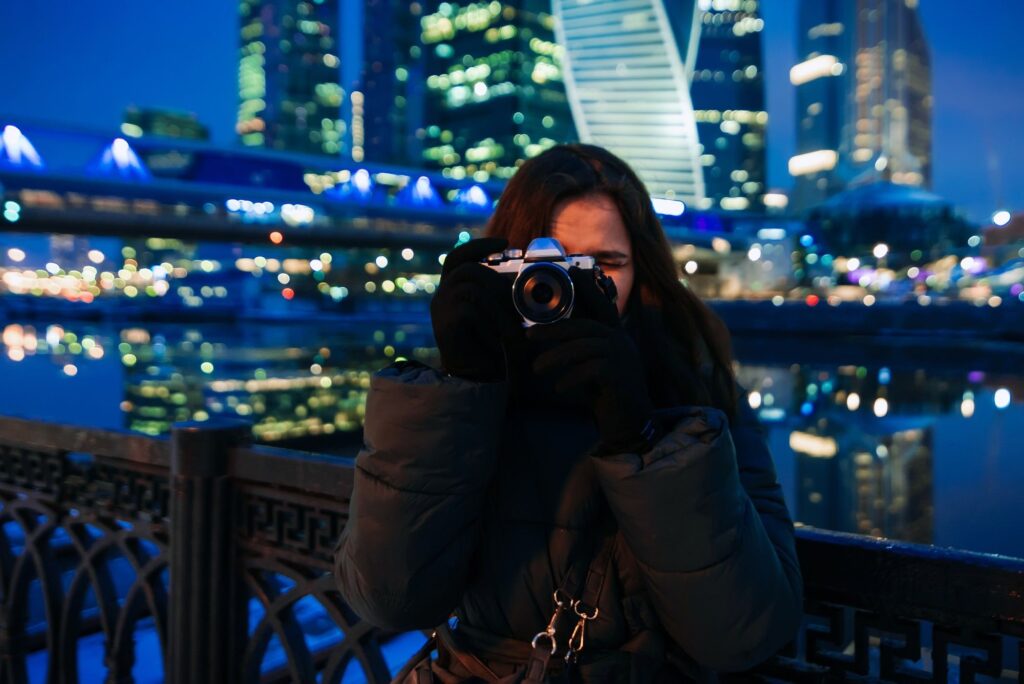
Finally, we come to cityscapes and urban night photography. Bustling cities, with their neon lights and high-energy scenes, provide fantastic opportunities for night photography. Urban landscapes can be incredibly dynamic, from capturing iconic landmarks lit up at night to shooting traffic trails.
These techniques offer varied ways to experiment and excel in night photography. Each technique has its unique charm, from long exposures and light painting to star trails, astrophotography, and urban night shoots. So, gear up, hit the dark, and let your creativity illuminate the night. The nocturnal world awaits your lens! In the realm of night photography, mastering specific techniques can set your images apart. Among these, long-exposure photography stands out. It involves opening the shutter for an extended period, allowing you to capture more light and movement. The result? Stunning images with smooth water effects or light trails from passing vehicles are a few examples.
Then, we have light painting, an imaginative and fun technique. Create radiant forms by maneuvering a light source, like a flashlight, during open shutter exposure. The limit is truly your creativity here.
Next up are star trails. This technique utilizes the Earth’s rotation to create spectacular circular patterns in the sky. It involves super-long exposures or stacking multiple shorter exposures in post-processing. Either way, the ethereal effect remains the same.
For those fascinated by the celestial wonders, astrophotography offers a unique thrill. It involves capturing the night sky, complete with stars, galaxies, and celestial events. It’s here where understanding moon phases, avoiding light pollution, and utilizing long exposure techniques prove essential.

Finally, we come to cityscapes and urban night photography. Bustling cities, with their neon lights and high-energy scenes, provide fantastic opportunities for night photography. Urban landscapes can be incredibly dynamic, from capturing iconic landmarks lit up at night to shooting traffic trails.
These techniques offer varied ways to experiment and excel in night photography. Each technique has its unique charm, from long exposures and light painting to star trails, astrophotography, and urban night shoots. So, gear up, hit the dark, and let your creativity illuminate the night. The nocturnal world awaits your lens!
Post-Processing Night Photos
Importance of RAW Format in Night Photography
Night photography does not end when the shutter closes; post-processing is where the final magic happens. To begin with, shooting in RAW format is invaluable for night photos. Unlike JPEG, RAW files contain all the data from your sensor, giving you much more flexibility when editing. You can adjust exposure, contrast, and colours without losing quality, which is essential for night shots.
Noise Reduction Techniques
Speaking of quality, reducing noise is a common concern in night photography due to higher ISO settings. Noise reduction tools, found in many editing software, can help here. However, use them sparingly to avoid smudging details.
Enhancing Details in Shadows and Highlights
Next, let’s discuss shadows and highlights. The goal is to enhance details without creating a fake HDR look. Use your software’s ‘Shadows/Highlights’ adjustment tools to gently increase detail in underexposed areas and tone down overly bright parts.
Color Correction and Balance
Colour correction is another significant aspect of post-processing. Night photos often suffer from colour casts due to artificial lighting or incorrect white balance. Use the colour balance tool to adjust your image’s overall colour tone and the hue/saturation sliders to fine-tune individual colours.
Software Recommendations
Lastly, finding the right software is vital. Adobe Lightroom and Photoshop are industry standards with extensive features suitable for night photo editing. For star trail processing, consider StarStaX. Beginners may find the user-friendly interface of Skylum Luminar appealing. Furthermore, noise reduction apps like Topaz DeNoise AI are highly recommended.
Post-processing your night shots can turn a good image into a great one. Whether it’s shooting in RAW, reducing noise, enhancing details, or correcting colours, every step can significantly improve your final result. With these insights and the right software, you can bring your night photos to life.
Case Studies of Successful Night Photography
Today, let’s journey into the world of night photography, focusing on iconic examples that have paved the way. First, we explore Andreas Gursky’s renowned “Paris, Montparnasse.” Here, Gursky employs a long exposure technique to capture a city in slumber. Notice the complex detail – a testament to his meticulous attention.
Let’s consider Gregory Crewdson’s “Untitled (Park Slope).” Crewdson artfully utilizes artificial lighting to breathe life into a moonlit streetscape. He bathes the scene in surreal tones, thus transforming ordinary into extraordinary.
Furthermore, we appreciate Brassai’s “Paris de Nuit.” His remarkable use of high contrast draws the eye, highlighting the vivid contrast between light and dark. Indeed, he wields shadows as a master storyteller, creating compelling narratives within the frame.
Moreover, in Steve McCurry’s “Ground Zero,” we see an apt demonstration of night street photography. McCurry’s acute sense of composition leads us through the aftermath of a disaster. He deftly captures the eerie yet hopeful scene with a depth that captivates us.
Now, let’s delve into insights from these legendary photographers. Gursky stresses the importance of experimenting with exposure settings, revealing how small adjustments can dramatically alter a scene’s mood. Meanwhile, Crewdson advocates for the creative use of artificial lighting. He believes it gives the photographer control over the narrative. Brassai, however, emphasizes the power of contrast. He suggests playing with darkness to highlight the elements you want to accentuate.
Finally, McCurry highlights the role of composition in creating impactful stories. He advises patience, waiting for the scene to arrange itself into a telling story. Truly, these night photography masters have taught us lessons about observing and capturing the world around us.
Studying the work of successful night photographers allows us to understand their methods and thought processes. We can draw inspiration from their techniques, applying them to our own work. Thus, the magic of night photography remains accessible to us all, illuminating the wonders of our world after dusk.
Best Practices and Tips for Night Photography
Let’s see the best practices and tips for night photography.Today we’lll dive into the art of night photography, shedding light on key practices for capturing stunning after-dark images.
- Patience and experimentation sit at the heart of night photography. Don’t rush for the perfect shot. Instead, experiment with different settings. You’ll uncover myriad effects, and therein lies the true beauty of night photography.
- Additionally, the mastering focus at night proves essential. Auto-focus might struggle in low-light conditions. Therefore, switch to manual focus. Use your camera’s live view mode, zoom in on your subject, and adjust the focus accordingly.
- Composition and framing also play a critical role. Strong compositions can create a striking contrast between light and dark at night. Look for patterns and leading lines. They can guide viewers’ eyes through the image, creating a dynamic, compelling scene.
- Two transitional phases emerge as favourites among photographers as night falls: the Golden Hour and the Blue Hour. The Golden Hour, occurring shortly after sunrise or before sunset bathes the world in warm, golden light. Conversely, right before sunrise or after sunset, the Blue Hour envelopes the world in a cool, ethereal light. These times offer unique lighting conditions that can truly enhance your night photography.
- Lastly, pay attention to the foreground. Foreground elements can add depth and dimension to your shots. They help establish a sense of scale and space, making your night sky or cityscape feel more expansive and immersive.
Excelling in night photography requires a solid understanding of a few key practices. Every aspect plays a significant role, from patience and focus to composition, optimal timing, and foreground elements. Embrace these tips, and you’ll find the night holds an enchanting array of photographic opportunities. So, grab your camera and step into the dark. The night awaits, full of stories for you to capture and share.
Conclusion
In conclusion, night photography is a captivating journey. Mastering manual settings is a cornerstone, paving the way for vivid images. Additionally, a sturdy tripod and precise manual focus ensure clear, sharp captures. Furthermore, shooting in RAW format gives you a powerful post-processing edge. Don’t overlook astrophotography either. The 500 rule and careful planning play pivotal roles here. Experimenting with light painting breathes artistic life into your images.
Lastly, remember that patience and persistent practice elevate your craft. Every night offers a fresh opportunity to seize its enchanting beauty. Embrace these tips, venture into the night, and let your creativity shine!

Frequently Asked Questions:
A: Go for a wider aperture, slower shutter speed, and higher ISO. Experiment and adjust based on your needs.
A: It’s crucial. A sturdy tripod helps eliminate camera shake, ensuring sharp and clear night images.
A: Absolutely. Post-processing can enhance details and balance colours, adding more drama to your night shots.
A: Use manual focus, try focusing on bright spots, or bring a flashlight to aid in focusing.
A: Always let someone know your location. Carry a flashlight, stay aware of your surroundings, and don’t risk dangerous spots for a shot.
A: Yes, practice improves skills and helps you better understand various aspects of night photography. Keep shooting and learning!