So, you’ve finally received your Tapo Camera, and you’re excited to set it up and start monitoring your home or office, but you’re stuck on how to connect it to the WiFi. Don’t worry, you’re not alone! Setting up a new device can be intimidating, especially when it comes to connecting to the internet. Luckily, we’ve put together a straightforward guide on how to connect your Tapo camera to WiFi, and we’ll walk you through it step by step.
By the end of this article, you’ll be a pro at connecting your Tapo camera to your WiFi network. So, let’s get started!
Check Your Network Compatibility
If you’ve recently purchased a Tapo camera and are wondering how to connect it to your home wifi network, it’s important to check for compatibility first. The Tapo camera is designed to work with 4GHz wifi networks, so if your network only operates on 5GHz, you’ll need to make some adjustments.
Fortunately, many modern routers are dual-band and can operate on both frequencies. If your router falls into this category, you’ll need to separate the two frequencies and connect the Tapo camera to the 4GHz network.
This can usually be done through your router’s settings page, accessed through a web browser on a computer or mobile device. Once your network is compatible, connecting the Tapo camera should be a breeze. Simply follow the instructions included in the packaging or in the Tapo app, which will walk you through the steps of connecting to your wifi network.
With a bit of patience and attention to detail, your Tapo camera will be up and running in no time.
Ensure That Your WiFi Is 2.4GHz
When it comes to setting up your WiFi network, one important factor to consider is compatibility. Specifically, you need to ensure that your WiFi is 4GHz.
This might sound technical, but it simply refers to the frequency that your network operates on. Many devices, such as smartphones and laptops, are designed to work with this frequency. However, if your WiFi operates on a different frequency, you may experience issues with connectivity or speed.
To check if your WiFi is 4GHz, you can usually find this information in your router’s settings or documentation. If you’re unsure, it’s worth contacting your internet service provider for assistance.
By ensuring your network is compatible with your devices, you can enjoy reliable and speedy internet access without any hiccups.

Setup Tapo Camera with the Tp-Link App
Connecting the Tapo Camera to wifi is an incredibly straightforward process when using the TP-Link app. First, ensure that the camera is powered on and placed close to your wifi router. Next, download the TP-Link app and create an account if you haven’t already.
Once signed in, select the “plus” icon to add a new device, and then follow the on-screen instructions to connect the Tapo Camera to your wifi network. Make sure to enter your wifi password correctly to avoid any issues. Once the camera is connected, you can customize its settings, view live footage, and receive alerts for any detected motion.
Overall, using the TP-Link app to connect your Tapo Camera to wifi is a quick and easy process that can be completed within a few minutes.
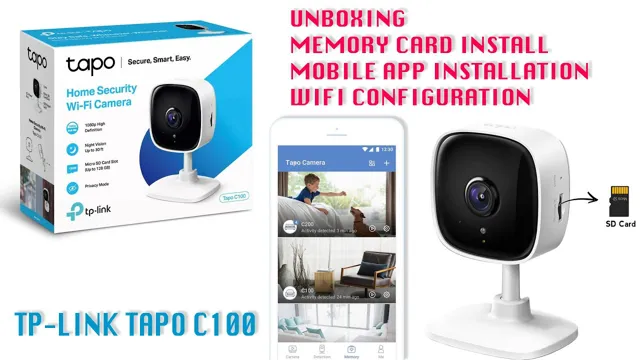
Download and Install the Tp-Link Tapo App
If you recently purchased a Tp-Link Tapo camera, the next step is to download and install the Tapo app on your smartphone or tablet. The Tapo app is available for both iOS and Android devices and can be downloaded from the App Store or Google Play Store. Once you have downloaded and installed the app, open it and create a Tapo account if you don’t already have one.
Follow the instructions to add your Tapo camera to the app. You will need to connect the camera to your Wi-Fi network, so make sure you have your network name and password handy. Once the camera is connected to your network, you can customize the camera settings, view live footage, and receive notifications when motion is detected.
With the Tapo app, you can access your Tapo camera from anywhere in the world with an internet connection. So, if you want to keep an eye on your home or office, or check in on your pets while you’re away, the Tapo app is an essential tool.
Create Tapo Account
If you’re looking to set up your Tapo camera with the Tp-Link app, the first step is to create a Tapo account. This is essential for accessing all of the features and functionalities of your camera. To create an account, download the Tapo app and follow the on-screen instructions.
Once you’ve created an account, you can add your Tapo camera by scanning the QR code on the camera or manually entering the camera’s serial number. From there, you’ll be able to customize your camera settings, view live streams, and receive alerts for any motion detection or sound detection. It’s important to note that you can also connect multiple Tapo cameras to the same account, making it easy to monitor all areas of your home.
So, if you’re ready to improve your home security, take the first step and create a Tapo account today.
Add Your Tapo Camera to the App
If you’ve recently purchased a Tapo camera, the next step is to set it up with the app. Thankfully, it’s a straightforward process. First, download the Tp-Link app onto your smartphone or tablet.
Next, plug in your Tapo camera and wait for the status LED to blink orange. Then, press the reset button on the camera until you hear a beep indicating a successful reset. Finally, use the app to connect to your WiFi network and follow the instructions to add your Tapo camera to the app.
Once you’ve completed these steps, you can access your Tapo camera’s live feed from anywhere through the app. It’s that easy! With this setup, you’ll have peace of mind knowing that your home is secure and that you have a clear view of everything that’s going on.
Connect Tapo Camera to WiFi
If you’re wondering how to connect your Tapo camera to WiFi, you’re in luck! It’s a straightforward process that can be completed in just a few steps. First, you’ll need to download the Tapo app and create an account. Then, connect your camera to a power source and follow the instructions in the app to put it in pairing mode.
Once your camera is in pairing mode, select your WiFi network in the app and enter your network password. The app will then connect your camera to your WiFi network and you’ll be able to view live video feeds from your camera. It’s important to remember to place your camera in a location with good WiFi signal strength to ensure a stable connection.
With these simple steps, you’re now ready to start monitoring your home or office with your Tapo camera!
Press the WPS button on Your WiFi Router
When first connecting your Tapo Camera to your WiFi network, you’ll need to press the WPS button on your WiFi router. It’s a simple process that usually only takes a few seconds, but it’s important to get it right to ensure a stable and secure connection. First, make sure your Tapo Camera is powered on and in pairing mode.
Then, locate the WPS button on your WiFi router – it’s usually labeled with the acronym “WPS” or a symbol of two arrows in a circle. Press and hold this button for a few seconds until the light on your router starts blinking. This indicates that the WPS connection has been activated.
Now, press the WPS button on your Tapo Camera within the next two minutes. Your camera will try to connect to your network automatically, and once the connection is established, the light on your camera will stop blinking and become solid. You’re now ready to start using your Tapo Camera with your WiFi network!
Press the WPS button on Your Tapo Camera
Connecting your Tapo camera to WiFi is a crucial step in ensuring seamless access to real-time footage of your home or office. Thankfully, it’s a straightforward process that can be completed in just a few easy steps. If you’re unsure how to get started, all you need to do is press the WPS button on your camera.
This button is usually located on the back or bottom of the device, and it’s designed to initiate the WiFi connection process. Once you press this button, your Tapo camera will automatically search for nearby WiFi networks and connect to the strongest signal available. In just a few moments, your camera will be online and ready to transmit live video feeds to your smartphone or computer.
So, if you want to monitor your home or office remotely, be sure to press the WPS button on your Tapo camera and start enjoying the peace of mind that comes with knowing everything is safe and secure.
Check Your Tapo Camera’s Connection Status in the App
If you have recently installed a Tapo camera in your home or office and it’s not working properly, one of the first things to check is its connection status. You can easily check this by opening the Tapo app and navigating to the device settings. From there, you should be able to see whether your camera is connected to WiFi or not.
If it’s not, you’ll need to connect it manually. To do so, navigate to the WiFi settings on your phone and connect to the Tapo camera’s network. Once connected, return to the app and follow the on-screen instructions to finish the setup process.
It’s important to note that a weak or unstable WiFi signal can cause issues with your Tapo camera’s performance, so be sure to position it in an area with strong signal strength. By following these simple steps, you can ensure that your Tapo camera is properly connected to WiFi and functioning as it should.
Conclusion
And there you have it! Connecting your Tapo camera to WiFi is as easy as pie. Whether you’re keeping an eye on your home, furry friend, or just want to keep tabs on your prized possessions, this handy little device will keep you in the loop wherever you are. So go ahead, set it up, and let the Tapo camera be your personal surveillance system.
Who knew keeping an eye on things could be so simple?”
FAQs
What are the requirements for connecting my Tapo camera to Wi-Fi?
To connect your Tapo camera to Wi-Fi, you will need a stable Wi-Fi network with internet access, the Tapo app installed on your mobile device, and your Tapo camera nearby.
How do I connect my Tapo camera to Wi-Fi using the Tapo app?
To connect your Tapo camera to Wi-Fi using the Tapo app, you need to open the app, go to “Add Device,” select your Tapo camera model, and then follow the on-screen instructions to connect your camera to Wi-Fi.
What should I do if the Tapo camera fails to connect to Wi-Fi?
If the Tapo camera fails to connect to Wi-Fi, you can try the following steps: confirm that your Wi-Fi network is stable, check if the Wi-Fi password is correct, reset the Tapo camera and try again, or change the Wi-Fi network to connect your camera to.
Is it possible to connect my Tapo camera to Wi-Fi without using the Tapo app?
No, it is not possible to connect your Tapo camera to Wi-Fi without using the Tapo app. The Tapo app provides a user-friendly interface for setting up and managing your camera, enabling you to adjust settings, view live footage, and receive alerts from anywhere.


