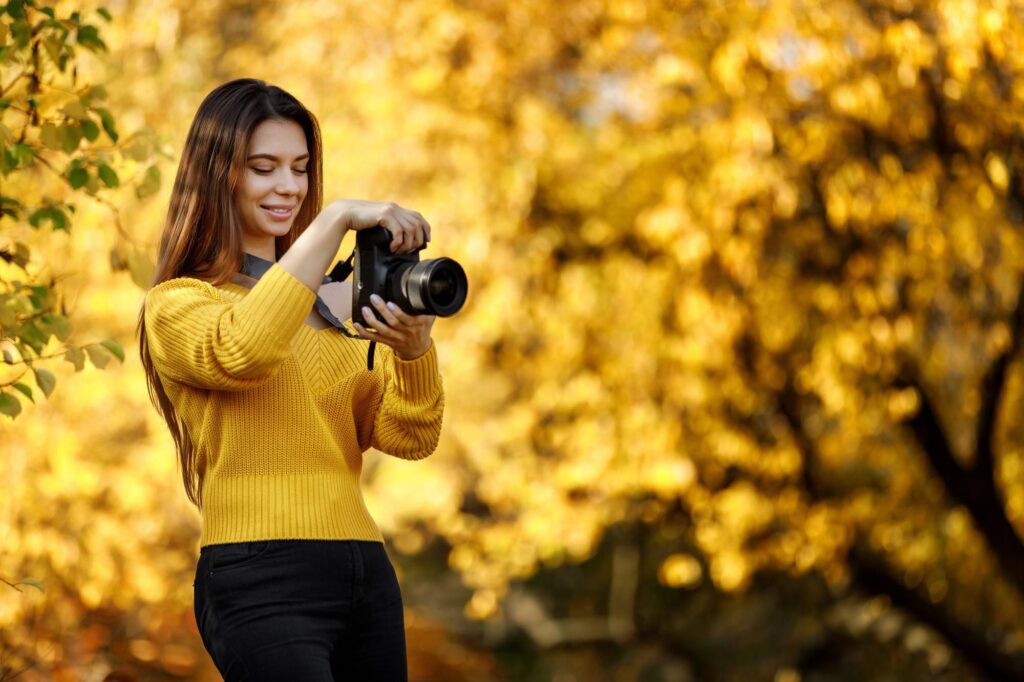
Mastering photography is a clear pathway to capturing life’s extraordinary moments in today’s digital age. Learning the basics, from framing to lighting, crafts a solid foundation for budding photographers. With these beginner-friendly tips, you’ll transform your snaps from ordinary to outstanding.
Today, we delve into the best photography tips for beginners – a comprehensive guide to transforming your photographic prowess. Harnessing these techniques will refine your skills and breathe life into your creative vision. This handy roadmap bridges the gap between novice and professional, illuminating the nuances of this expressive art form. Stay tuned to unveil the secrets of professional photography – right from your first click.
Table of Contents
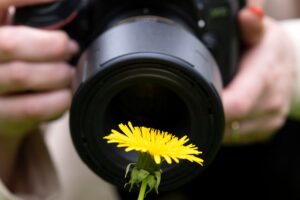
Understanding Your Equipment for Photography
Delving into the world of photography means acquainting yourself with an array of equipment. At the heart of it all, your camera is the key to capturing breathtaking shots. Various camera types, each with their unique strengths, await your discovery.
First off, we have DSLRs, a favourite among professionals. They offer superior image quality, robust manual controls, and the freedom to change lenses, ensuring flexibility in diverse shooting conditions. Next, mirrorless cameras come into play, combining DSLR-like features in a compact and lighter body, ideal for on-the-go photography.
Then, we have point-and-shoot cameras. Don’t let their size fool you. These pocket-friendly devices provide excellent image quality, boasting the most straightforward operation for beginners. All these cameras differ in many ways, yet they share one common trait – the necessity of understanding them thoroughly.
Why is this understanding essential, you ask? Getting to know your camera means harnessing its potential to the fullest. From familiarizing yourself with its manual settings to exploring the menu options, these steps empower you to make well-informed decisions while shooting. You’ll not only improve your technical know-how but also get to apply these insights creatively.
Now, let’s shift our focus to the lens – the eye of your camera. With many lenses in the market, choosing the right one can often seem daunting. The secret lies in understanding your photography needs and the types of photos you aim to capture. A wide-angle lens works wonders for landscape shots, while a telephoto lens is a go-to for wildlife or sports photography.

Remember, each lens has its personality, affecting factors like depth of field and perspective. Therefore, feel free to try different approaches until you discover the ideal fit. Understanding your photography equipment plays a crucial role in your artistic journey, turning your visions into reality. It’s the first step to becoming a master behind the lens.
Fundamental Camera Settings for Photography
Embarking on your photography journey requires grasping the core camera settings, which are pivotal to refining your images. One concept that stands above all else is the exposure triangle, comprising Aperture, Shutter Speed, and ISO.
Let’s first discuss the Aperture, which controls the amount of light entering the camera. Lower aperture values (f/1.8, f/2.8) provide better light and a more superficial depth of field, while higher values (f/16, f/22) give less glare and a more comprehensive depth of field.
Then comes Shutter Speed, which dictates the duration the shutter remains open. Faster speeds (1/500, 1/1000 sec) freeze motion, while slower speeds (1/15, 1 sec) blur movement.
Lastly, ISO manages the camera’s sensitivity to light. Lower ISO values (100, 200) mean less sensitivity, perfect for bright conditions. Conversely, higher ISOs (800, 1600) work well in low-light situations, albeit at the risk of noise.
Understanding this trinity enables you to balance light, motion, and noise, thus ensuring optimal exposure.
Now, moving onto White Balance, this setting corrects colour casts in your photos. It’s crucial for accurately depicting colours in various lighting conditions. Use the preset options (Daylight, Cloudy, Tungsten) or customize it to fit your scene for images that look true to life.
Lastly, we must recognize the importance of image formats. Here, the primary contenders are RAW and JPEG.
RAW files preserve all the image data, giving you maximum editing flexibility. They are the preferred choice when you wish to manipulate the images post-shooting. However, they demand more storage space and post-processing time.
On the other hand, JPEG files are processed within the camera and are ready to use. They are smaller, easier to share, and suitable for situations where speed matters more than editing latitude.

Understanding the distinction between these formats will help you decide the best choice based on your requirements.
Mastering the art of photography requires not only an understanding of your equipment but also a significant amount of Creativity. Understanding these basic settings serves as the bridge between your vision and the final image. As you explore these settings, you’ll discover they’re not just controls but tools to mould your creative expression.
Composition Techniques for Photography
Mastering the art of photography is about more than just understanding your equipment. It’s also about learning essential composition techniques to turn ordinary images into extraordinary ones.
Let’s begin with the Rule of Thirds, a fundamental principle in photography composition. Imagine dividing your image with horizontal and vertical lines, creating nine equal parts. Placing your subject along these lines or at their intersections enhances the visual interest in your shot.
Next up, we have Leading Lines. These lines within an image guide the viewer’s eye to the main subject. From roads to stairways, If you keep an eye out, you can find leading lines everywhere.
Another captivating technique involves the use of Natural Frames. Framing your subject with elements such as trees, archways, or windows can add depth and context to your photograph, making it more engaging.
Let’s remember the Depth of Field, an essential element in creating a sense of dimension. By adjusting your Aperture, you can control the focus area in your image. A smaller aperture (higher f-stop number) keeps everything sharp, while a larger aperture (lower f-stop number) blurs the background, drawing attention to your subject.

Lastly, we have Symmetry and Patterns, which can infuse a sense of harmony and intrigue into your images. The repetition of colours, shapes, and textures can create visually pleasing patterns, while symmetry can provide a sense of balance.
Comprehending and creatively implementing these composition techniques can significantly enhance the quality of your photographs. As you practice, you’ll see these techniques as rules and tools to express your unique perspective. Each image you capture will testify to your growing skills and an artistic eye, propelling you forward on your photography journey.
Lighting Techniques for Photography
In photography, lighting isn’t just an aspect; it’s a language. It can evoke emotions, create drama, and guide the viewer’s eye. Let’s explore the techniques that make lighting one of the most significant elements in photography.
First, we delve into the realm of Natural Lighting. The sun, our primary light source, delivers varying moods depending on the time of day. Understanding these changes allows you to manipulate natural light to evoke the desired ambience.
Next, we venture into Artificial Light Sources. When natural light is insufficient, these sources regulate illumination, ranging from professional studio lights to ordinary household lamps. Adjusting their intensity and direction allows you to create compelling shadows and highlights in your compositions.
Discussion about lighting would only be complete by mentioning the Golden Hour. Shortly after sunrise or before sunset, this period bathes the scene in a warm, soft glow. It’s a magical time that can lend a dreamy quality to your images.
Finally, we look at the often misunderstood tool: the Flash. Flash can illuminate your subject evenly or introduce dramatic lighting effects effectively. Bouncing the Flash off ceilings or walls can also help avoid harsh shadows, ensuring more natural-looking results.

By mastering these lighting techniques, you’ll significantly enhance the visual impact of your photographs. Remember, it’s all about understanding and creatively adapting the light to your needs. So, experiment, and let your images shine with brilliance. Lighting is a doorway to Creativity in photography; by stepping through, you open up a world of possibilities.
Developing Your Photographer's Eye
In the photography journey, developing your ‘Photographer’s Eye’ is essential to crafting visually compelling narratives. This innate sense of aesthetics goes beyond mere technique; it delves into observation, Patience, and Creativity.
Observation is your foremost tool. Constantly being aware of your surroundings can unearth mundane yet extraordinary scenes. Seek inspiration in everything, from grand landscapes to minor details. Remember, photography is the art of transforming the ordinary into the extraordinary.
Then comes Patience, a virtue that plays an instrumental role in capturing that perfect shot. Whether it’s remaining for the right light or the decisive moment, Patience often reaps the most rewarding photos. Embrace this waiting game, making the eventual capture all the more satisfying.
Lastly, we must recognize the role of Creativity. There are no limitations to what your imagination can conjure. Experiment with angles, composition, and lighting. Break the rules, create your own, and let your unique perspective shine through your work.
Learning to see the world through Creativity and curiosity will elevate your photographic journey. It is about tuning into the subtle nuances, the fleeting moments, and the underlying emotions that often go unnoticed. This refined vision is what distinguishes a snapshot from a thought-provoking photograph.
Developing your photographer’s eye is a continual process, as personal as artistic. So, keep observing, stay patient, and let your creativity flow. You’re ready to share your unique vision with the world.
Post-Processing Basics for Photography
Post-processing is integral to the photographic journey, offering the final touches that can turn good photos into great ones. Let’s delve into the essential components of this creative process.
First, we encounter Photo Editing Software. Programs like Adobe Lightroom and Photoshop, or more straightforward tools like Snapseed and VSCO, give you the control to fine-tune your images. They provide a playground to bring your creative vision to life.
Among the most crucial aspects of post-processing are Color Correction and Enhancement. Adjusting parameters like saturation, vibrancy, and colour balance can breathe life into your photos, making them pop. Experiment with these stages to see how they transform the mood of your image.
Next in line, we find Cropping and Alignment. Cropping can help remove distracting elements, thus improving the overall composition. Meanwhile, alignment tools ensure that your horizons are level, making the image pleasing to the eye.

Lastly, we step into the vibrant world of Filters and Effects. These ready-to-use presets can add unique styles to your images, from vintage looks to dreamy soft-focus effects. But remember, the key lies in moderation to ensure a natural-looking result.
Post-processing isn’t about manipulating reality; it’s about enhancing it. With these tools, you can fine-tune your vision and translate it into compelling imagery. So, take the leap, explore the possibilities, and let your Creativity shine in your processed images.
Remember, photography doesn’t end with the click of a shutter; it continues on the editing desk. By understanding and mastering these basics of post-processing, you’ll elevate your photography skills to new heights, producing images that resonate with your unique style and vision. The world of post-processing awaits your creative touch. Let’s dive in!
Understanding Photography Styles
The realm of photography is as diverse as the photographers who inhabit it. It teems with various styles and genres, each carrying its unique charm and challenges. The choice from the thrill of wildlife photography to the intimacy of portraits is extensive.
Every genre requires specific skills and aesthetics, thus providing ample opportunities to learn and grow. By exploring these styles, you improve your technique and gain insights into what truly captivates you. And therein lies the seed to finding your style and niche.
Your style is your voice, your unique perspective on the world. It takes time to find it. Instead, it’s a journey of experimentation, learning, and self-discovery. As you navigate different genres, pay attention to what resonates. Whether it’s the raw emotions in street photography or the vibrant beauty in landscape shots, you’ll begin to see patterns that reflect your interests and strengths.
Remember, embracing your unique style does not mean boxing yourself into a genre. It means honing your vision and technique to create images that resonate with your soul. So, take time, explore, experiment, and let your unique style emerge naturally. With persistence and passion, you’ll find your niche and, through it, your distinctive voice in photography.
Practice Makes Perfect
“Practice Makes Perfect” is a tried and tested adage that holds particularly true in photography. Regular practice does more than improve your skills; it sharpens your creative eye and helps develop your unique style.
Creating a Portfolio can serve as an effective practice tool. A portfolio showcases your work and growth as a photographer. Continually updating it with your best photos keeps you engaged and motivated. Also, revisiting your past work can help you see improvements, understand patterns, and identify areas that need more attention.
Engaging in workshops, classes, and photography communities greatly enhances your learning and practice. These platforms provide you with technical knowledge and expose you to diverse styles and perspectives. They provide invaluable feedback, help you network with fellow photographers, and keep you in sync with industry trends.
Participation in these communities fuels your passion and broadens your horizons. By learning from others, you will gain fresh insights and stay motivated. They act as an origin of inspiration and offer an avenue to share your work, gather constructive criticism, and learn from the experiences of others.
Remember, the journey of photography is a continuous learning process. Each click of the shutter brings you closer to honing your craft. Every critique, every insight, and every shot adds to your growth.
Embrace this journey with a passion for learning, and you’ll see your skills, style, and confidence flourish. So, pick up your camera, be active in your photography community, keep updating that portfolio, and never stop practising. After all, in photography and life, practice makes perfect.
Typical Beginner Mistakes and How to Avoid Them for Photography
Embarking on the journey of photography can be exhilarating yet riddled with common beginner mistakes. But worry not; we’re here to navigate these potential pitfalls and provide practical tips to overcome them.
A common misstep often made by newbies is underestimating the importance of comprehending their equipment. It’s crucial to familiarize yourself with the ins and departures of your camera and its settings. An intimate knowledge of your gear will let you adapt to various shooting conditions, ensuring consistently better results.
Another frequent blunder is neglecting composition. Good composition is a cornerstone of great photography. Embrace techniques like the Rule of Thirds, Leading Lines, and Natural Frames to enhance the visual appeal of your images.
Moreover, beginners often need to pay more attention to the critical role of lighting. Learning to work with different light conditions – natural, artificial, or the magical Golden Hour – can dramatically improve your photos. So, always heed your scene’s quality, direction, and light intensity.
Last, beginners sometimes rush into post-processing, applying excessive edits that overpower the image. The golden rule of post-processing is subtlety. Use it to enhance, not overshadow, the inherent beauty of your shot.
In essence, every mistake you make is a stepping stone to improvement. So, continue to learn, practice, and refine. With time, you’ll notice these common mistakes diminishing and your skills flourishing. Remember, every great photographer was once a beginner too. Stay patient, stay inspired, and keep clicking!
Conclusion
In conclusion, mastering photography as a beginner involves understanding your equipment, basic camera settings, and essential composition techniques. These steps, good lighting practices and developing your photographer’s eye, are crucial in your journey.
Moreover, mastering post-processing basics, understanding various photography styles, and acknowledging the importance of regular practice further enhance your skills. However, remember that mistakes are part of the journey. They serve as meaningful learning experiences.
Photography isn’t just about capturing moments; it’s about telling stories, expressing emotions, and seeing the world through a unique lens. It’s a continuous journey of learning, exploring, and growing. Even the most accomplished photographers know there’s always more to learn, research, and create.
So, keep clicking, keep learning, and always remember why you fell in love with photography. As you embark on this exciting journey, remember that each click of the shutter is a step closer to perfecting your craft. Happy shooting!
Frequently Asked Questions
A: DSLRs, mirrorless, and point-and-shoot cameras all work well for beginners.
A: Understanding the exposure triangle helps control lighting in your shots. This triangle includes Aperture, shutter speed, and ISO.
A: JPEG compresses images, while RAW files contain uncompressed, higher-quality data. For editing, RAW proves better.
A: The Rule of Thirds divides images into nine equal parts. It helps achieve balance in your composition.
A: Mastering natural and artificial light creates depth and texture. Try shooting during the golden hour for stunning natural light.
A: Patience plays a vital role in capturing the perfect shot. Often, waiting for the right moment brings about great results.
A: Photo editing software improves colour, alignment, and overall image quality. It’s crucial for post-processing your shots.
A: Experiment with different genres and techniques. Over time, you’ll find a style that resonates with you.
A: Practice enhances your skills and helps you understand camera settings better. It also helps develop your unique style.
A: Common mistakes include over-editing, poor composition, and incorrect focus. Remember, continuous learning and practice can help overcome these pitfalls.